The Ultimate OpenClaw AWS Setup Guide
Setting up your own AI assistant on AWS takes less than 30 minutes and costs under $10/month. This guide walks you through every step — from creating your AWS account to running OpenClaw on a spot instance. No prior cloud experience needed.
Step 1: Sign Up for AWS
The first step is to simply sign up for AWS (Amazon Web Services) if you haven't done so already.
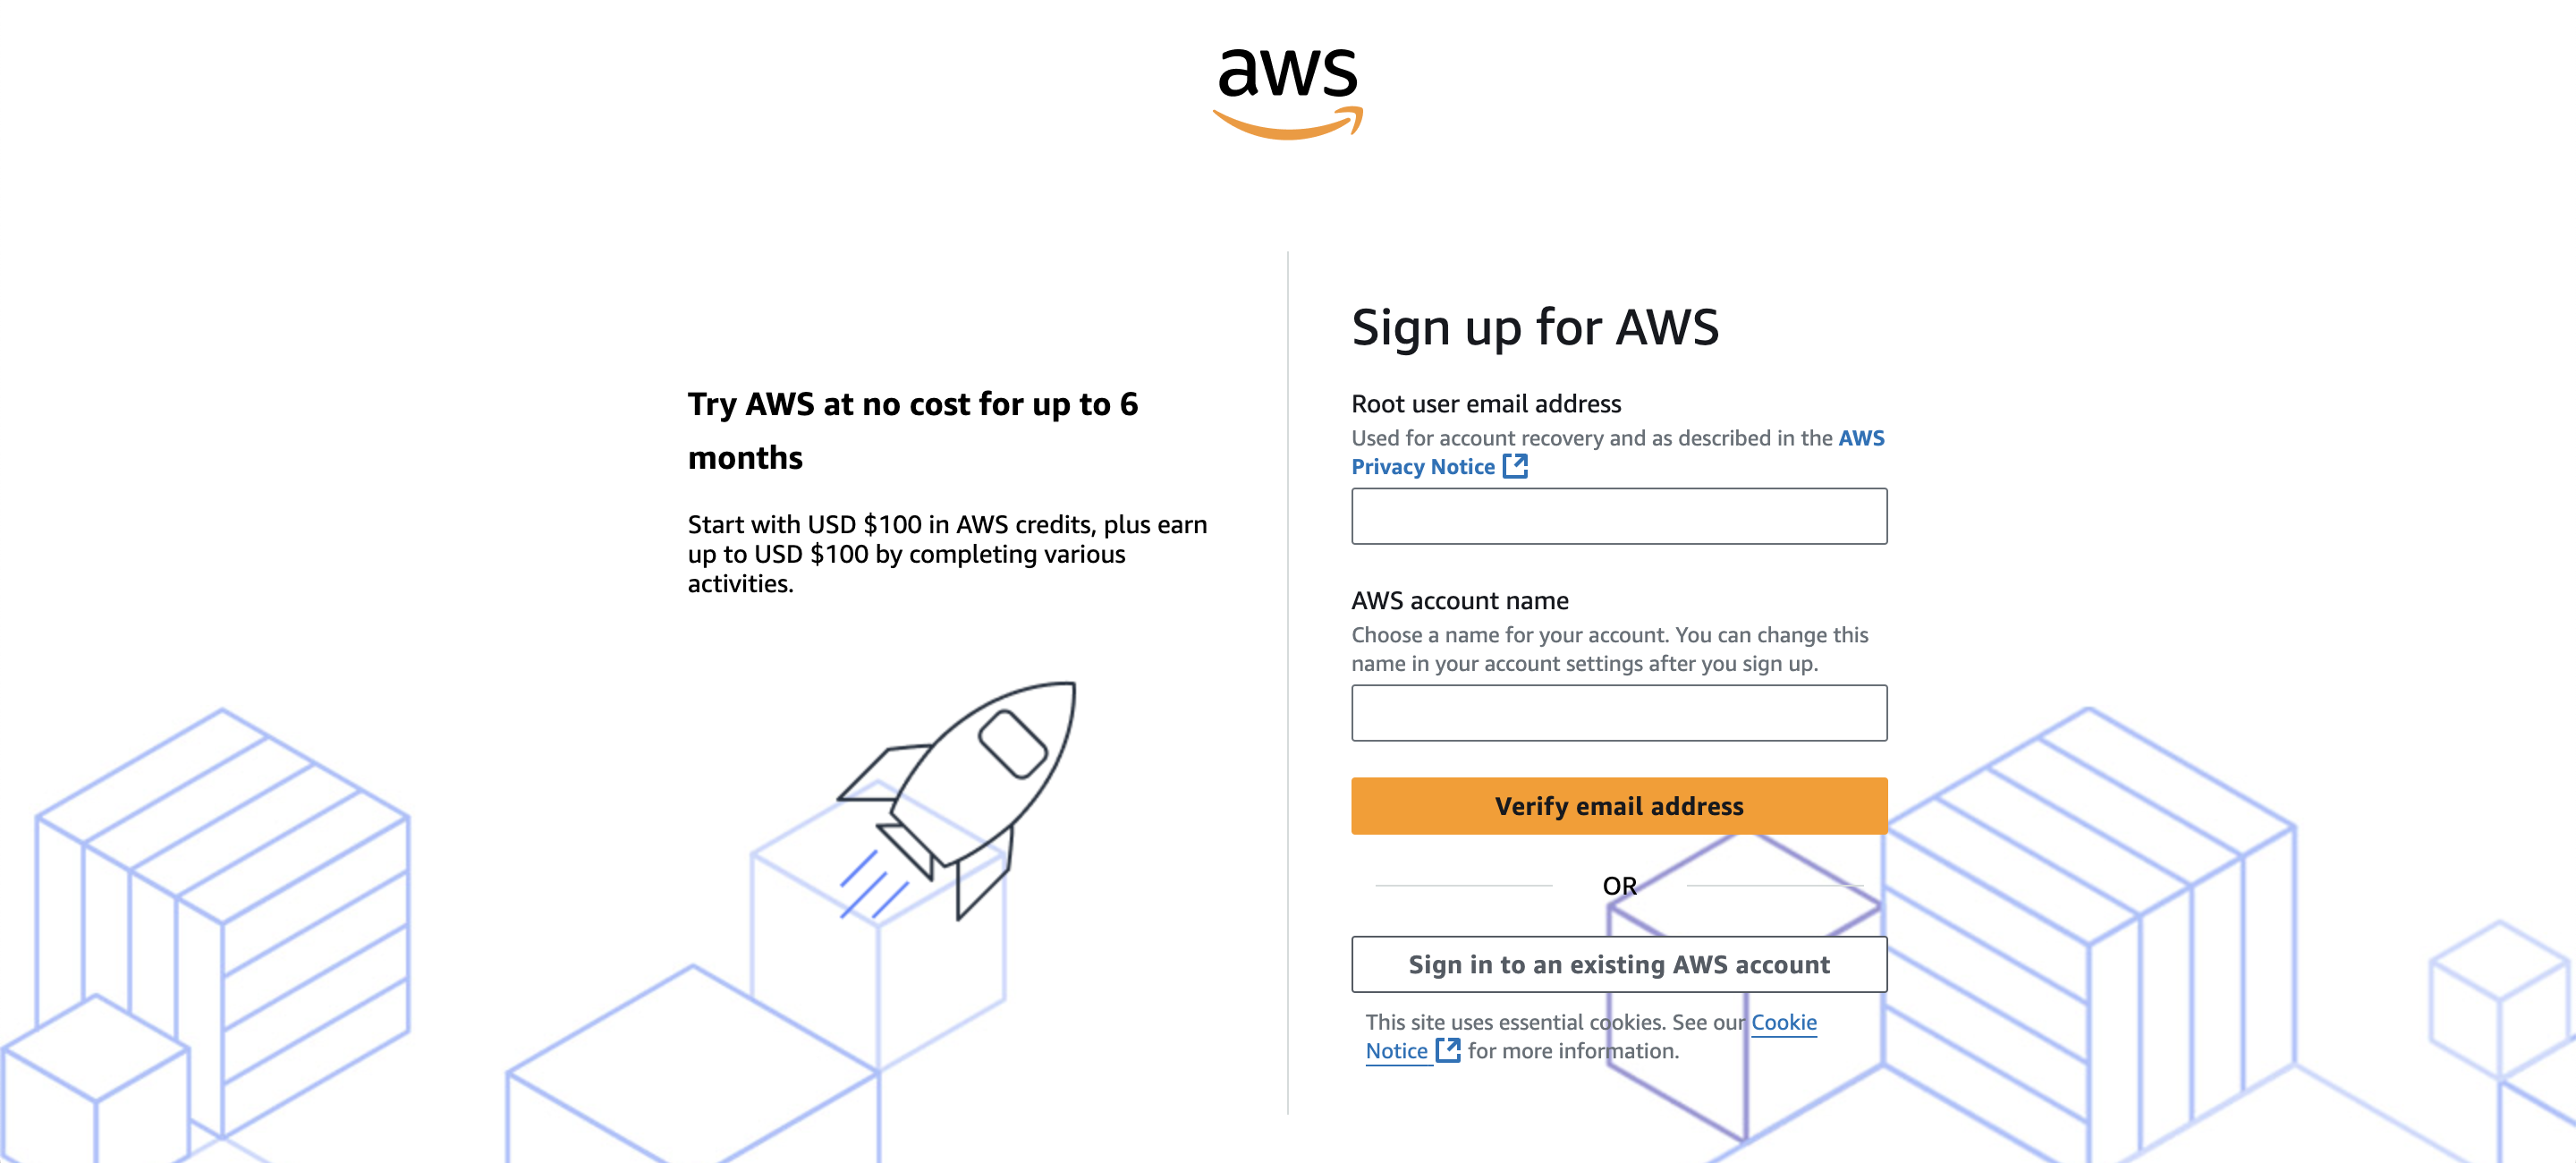 AWS Signup Page
Go to aws.amazon.com and click Create an AWS Account. If you already have an account, click Sign in to an existing AWS account.
Step 2: Search for EC2
Once logged into the AWS Console, search for "EC2" in the search bar at the top.
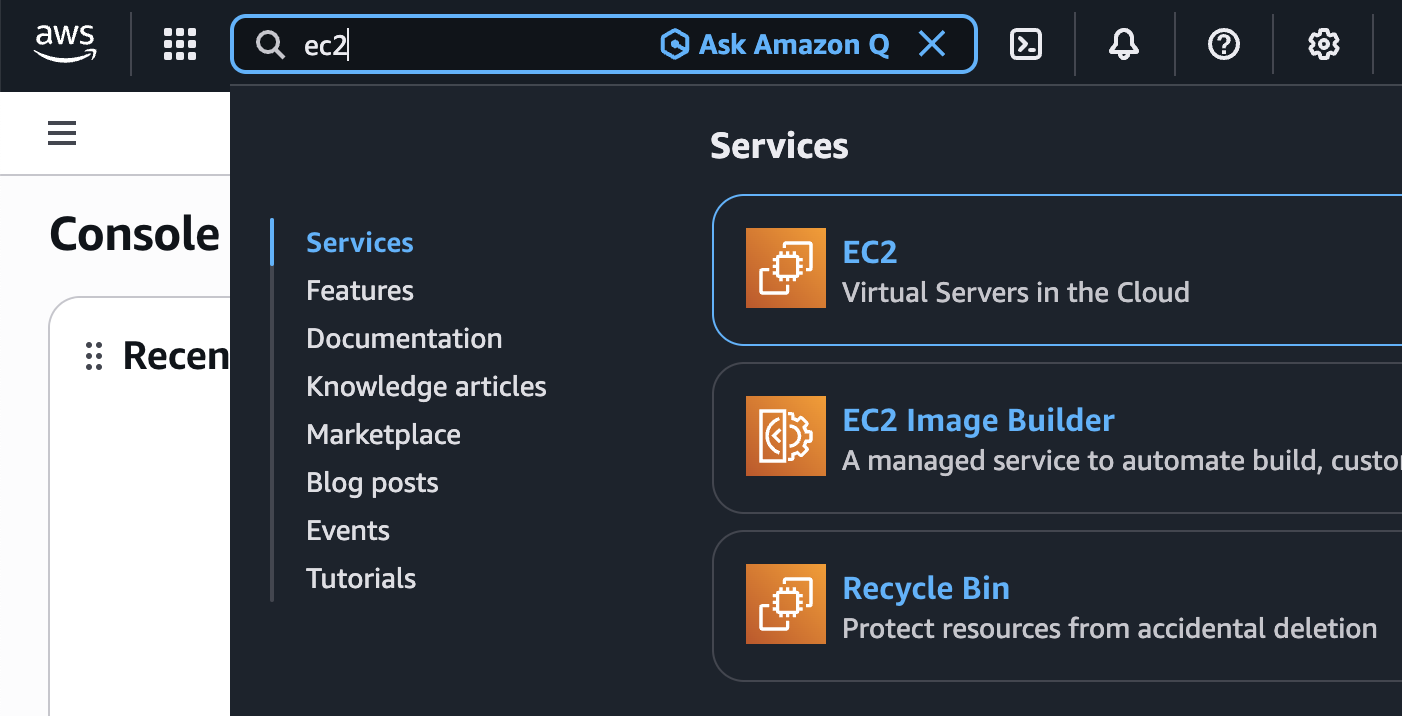 Search for EC2
Click on EC2 - Virtual Servers in the Cloud to open the EC2 Dashboard.
Step 3: Launch Instance
From the EC2 Dashboard, click the orange Launch instance button.
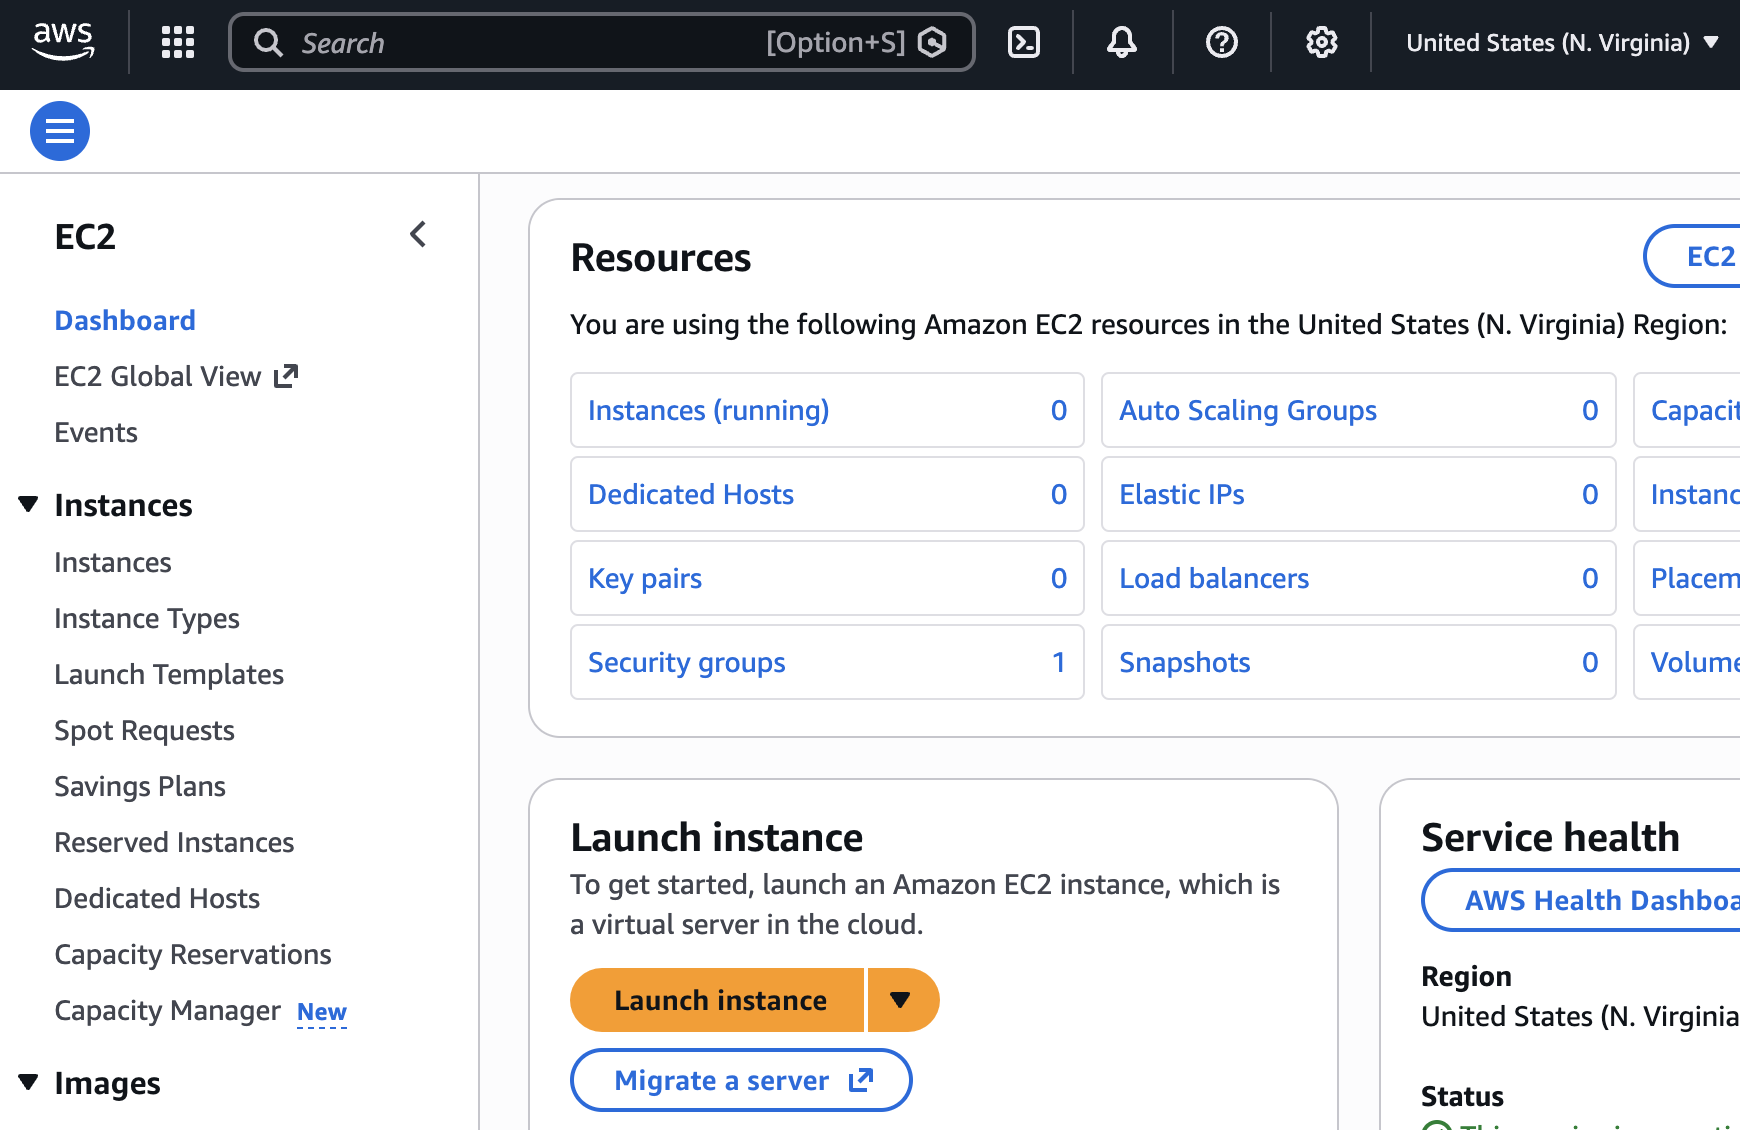 EC2 Dashboard
This will open the instance launch wizard.
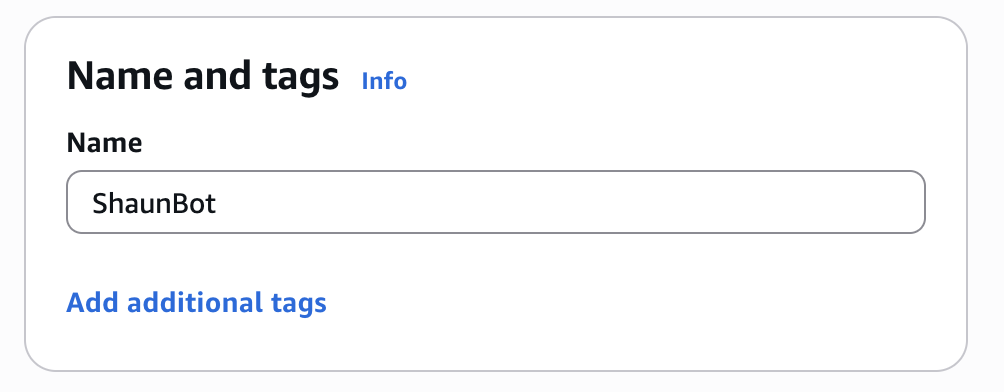
Step 4: Name Your Instance
Give your instance a memorable name. We'll call it "ShaunBot" but you can name it whatever you like.
 Name Your Instance
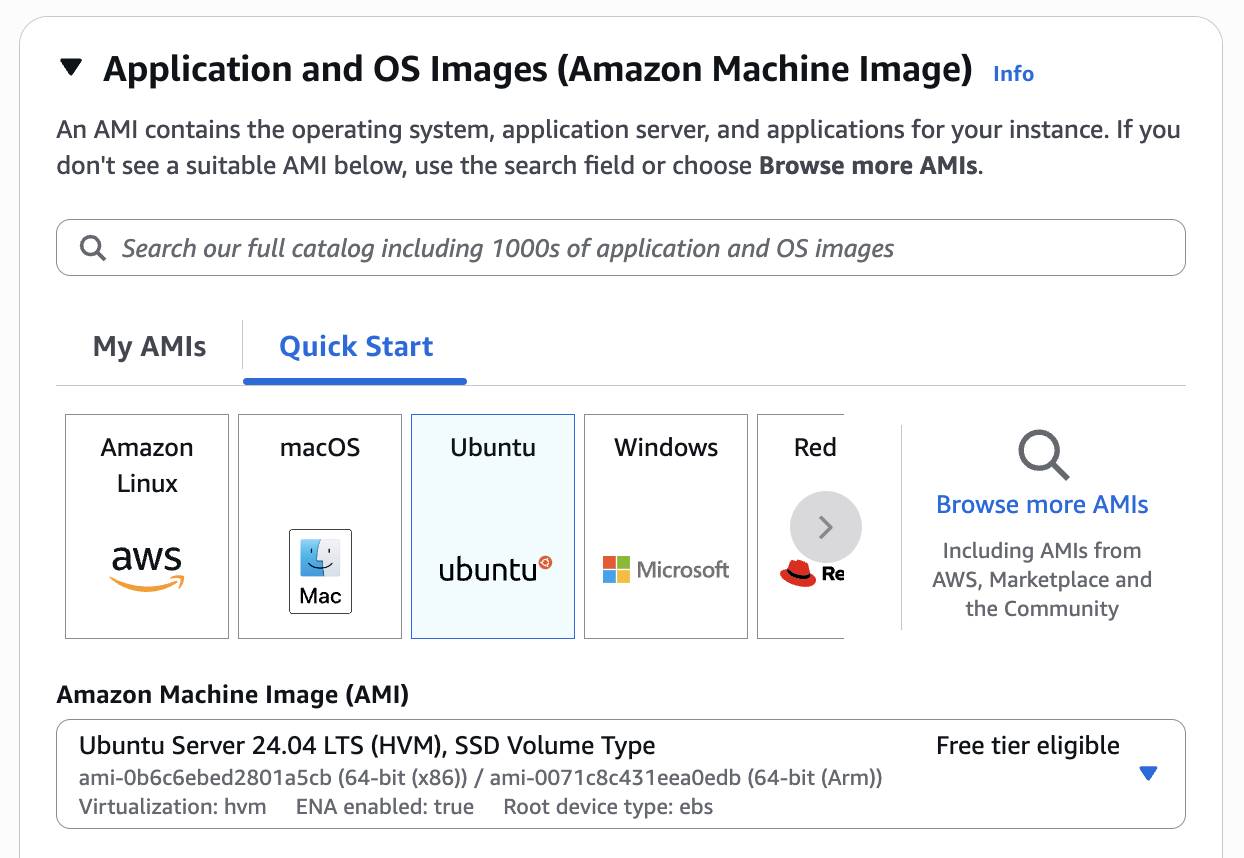
Step 5: Select Ubuntu
Under Application and OS Images, select Ubuntu from Quick Start, then choose Ubuntu Server 24.04 LTS.
 Select Ubuntu AMI
Ubuntu 24.04 LTS is free tier eligible and works great with OpenClaw.
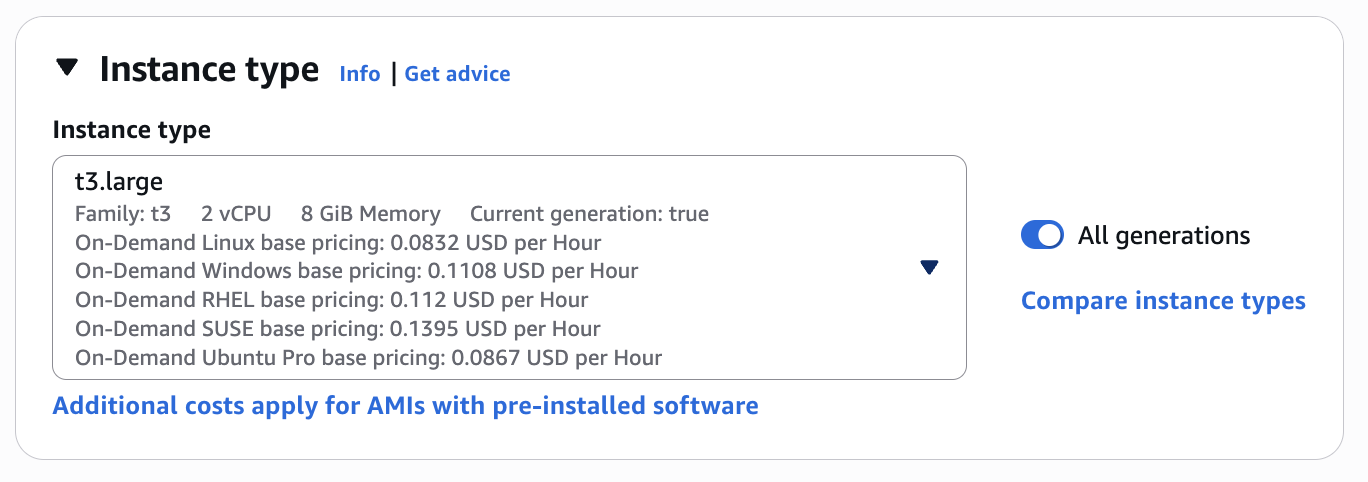
Step 6: Select Instance Type
Choose t3.medium as your instance type. This gives you 2 vCPUs and 4 GB of memory - plenty for running OpenClaw.
 Select Instance Type
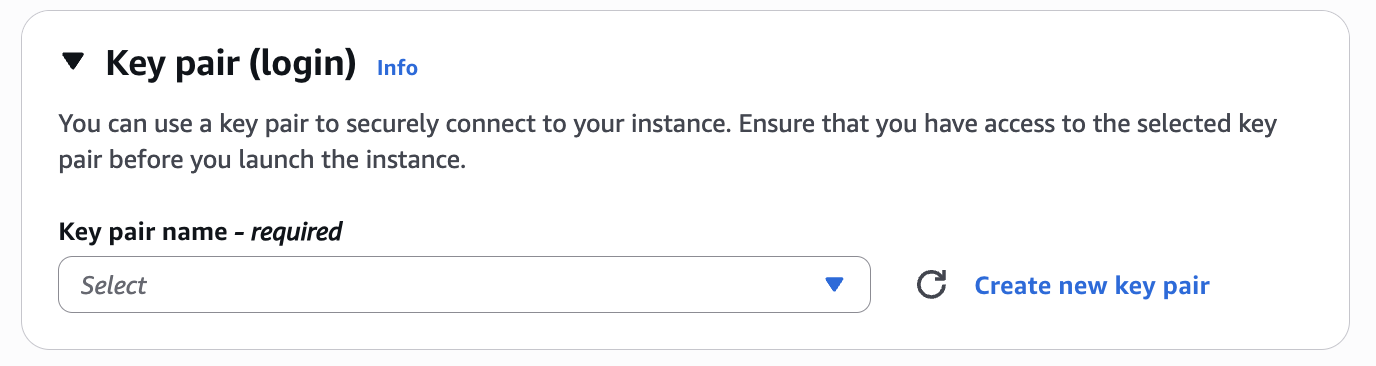
Step 7: Create a Key Pair
You'll need a key pair to connect to your instance via SSH. Click Create new key pair.
 Key Pair Section
In the dialog, enter a name for your key pair, select RSA and .pem format, then click Create key pair.
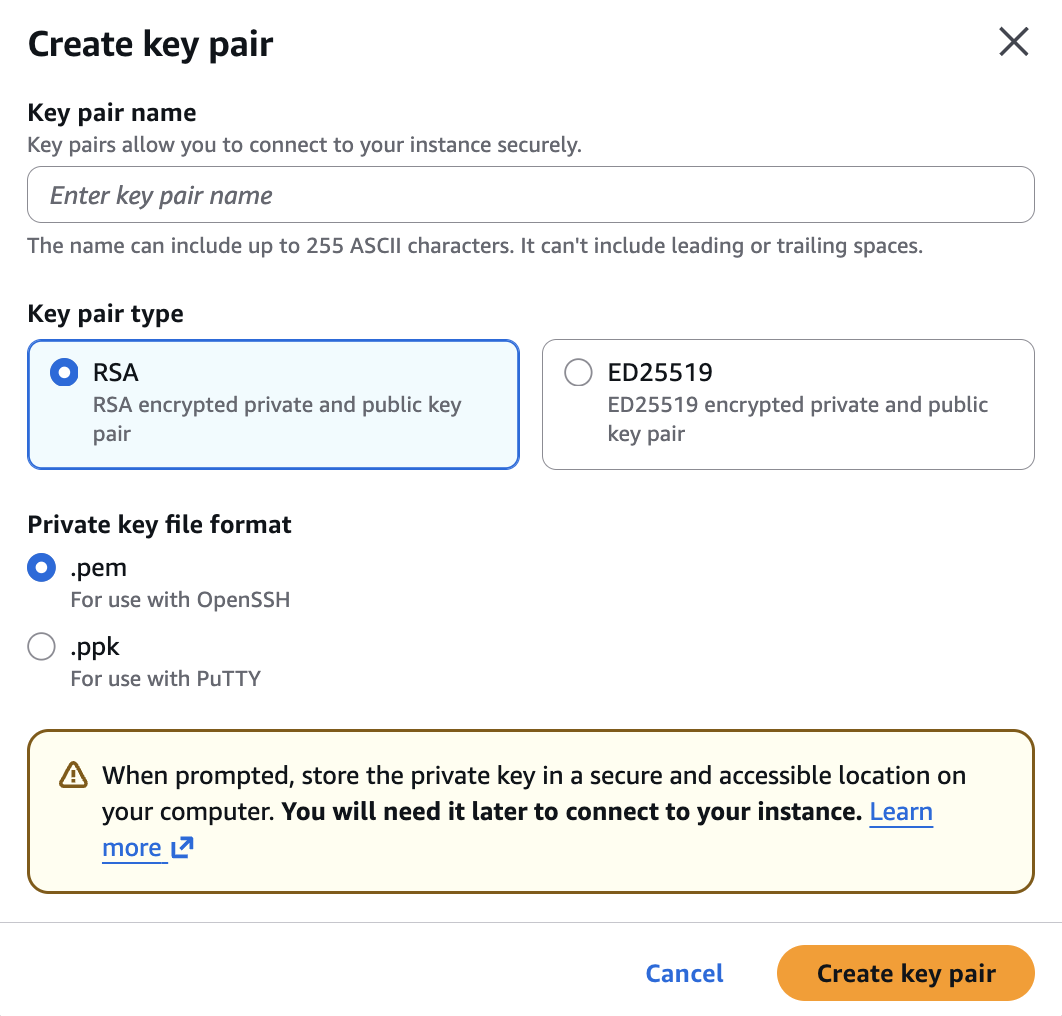 Create Key Pair
Important: Save the downloaded .pem file securely - you'll need it to connect to your instance later.
Step 8: Configure Storage
Scroll down to Configure storage and set it to 20 GiB gp3:
 Configure Storage
20GB gives you plenty of room for OpenClaw, logs, and any tools you install.
Step 9: Enable Spot Instance
Under Advanced details, find Purchasing option and select Spot instances. This saves you ~70% on compute costs!
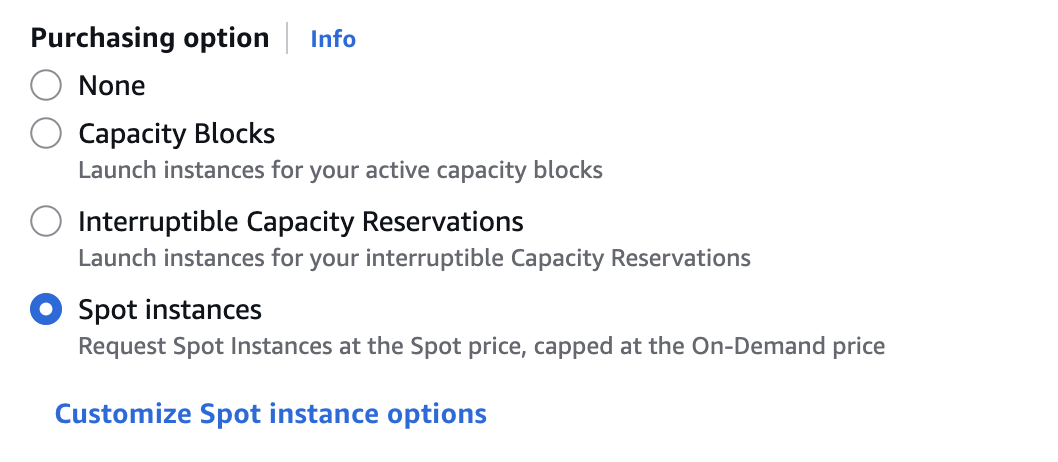 Spot Instance Option
Configure Spot Options
Click Customize Spot instance options to configure the settings:
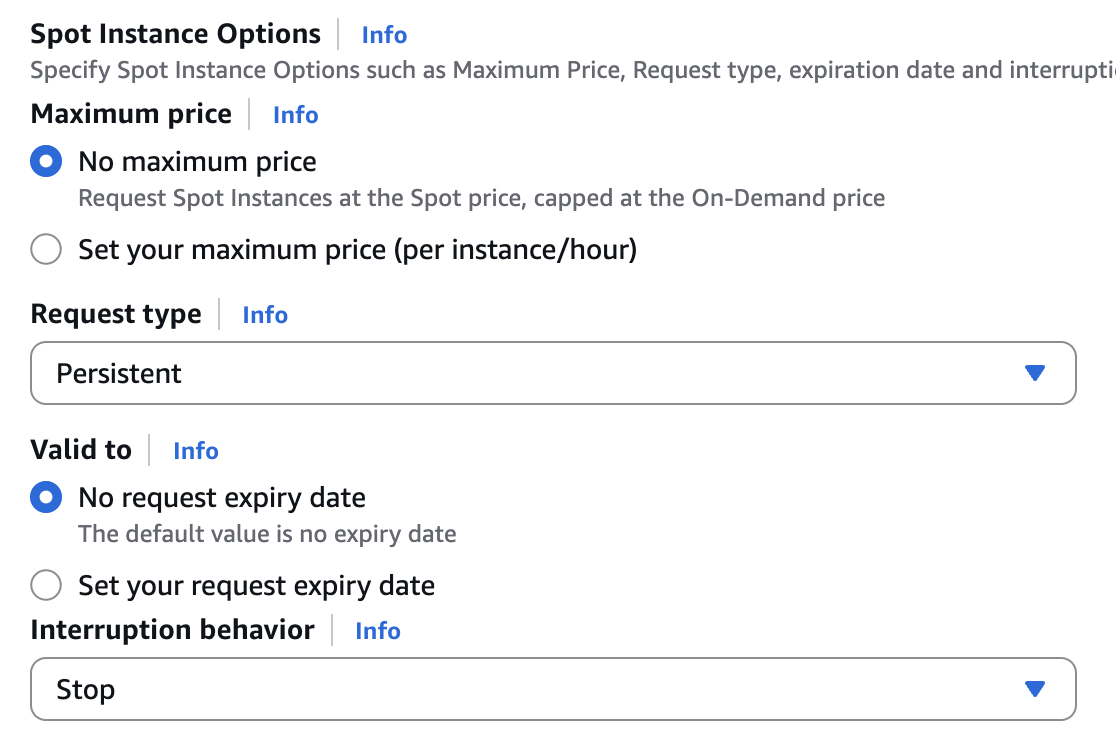 Spot Instance Options
- Maximum price: Select "No maximum price" (capped at On-Demand price)
- Request type: Choose "Persistent" so it restarts if interrupted
- Interruption behavior: Set to "Stop" to preserve your data
Spot instances are perfect for OpenClaw - they're cheap and any interruptions can be handled gracefully.
Step 10: Review and Launch
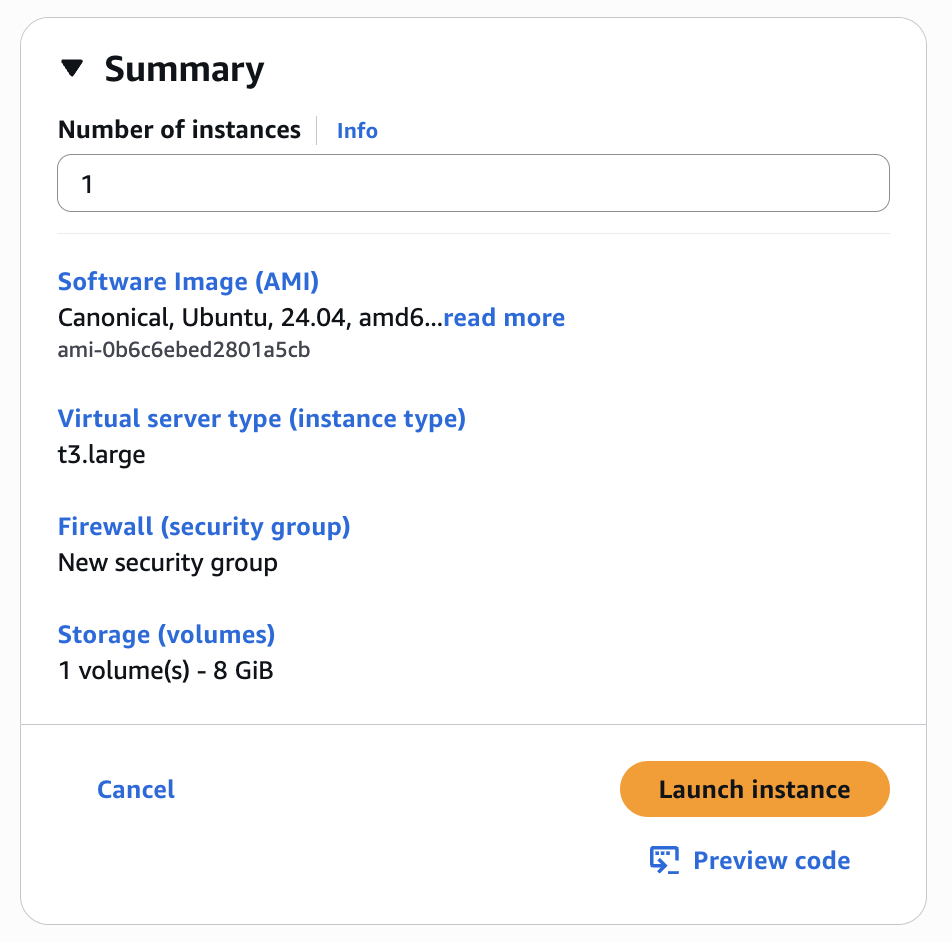
Review your configuration in the Summary panel. You should see:
- Ubuntu 24.04 LTS
- t3.large instance
- 8 GiB storage
- Spot instance pricing
 Launch Summary
Click Launch instance when ready.
Step 11: Success!
You'll see a success message confirming your instance is launching.
 Launch Success
Step 12: View Instance Details
Click on the instance ID to view your instance details. Wait for the Instance state to show Running.
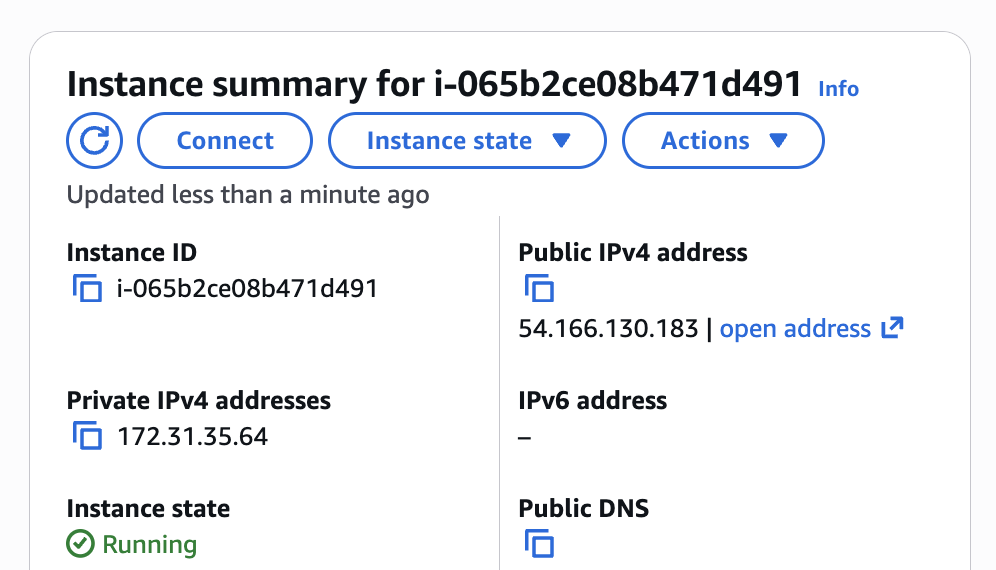 Instance Summary
Note your Public IPv4 address - you'll need this to connect.
Step 13: Connect to Your Instance
Click the Connect button at the top of the instance details page.
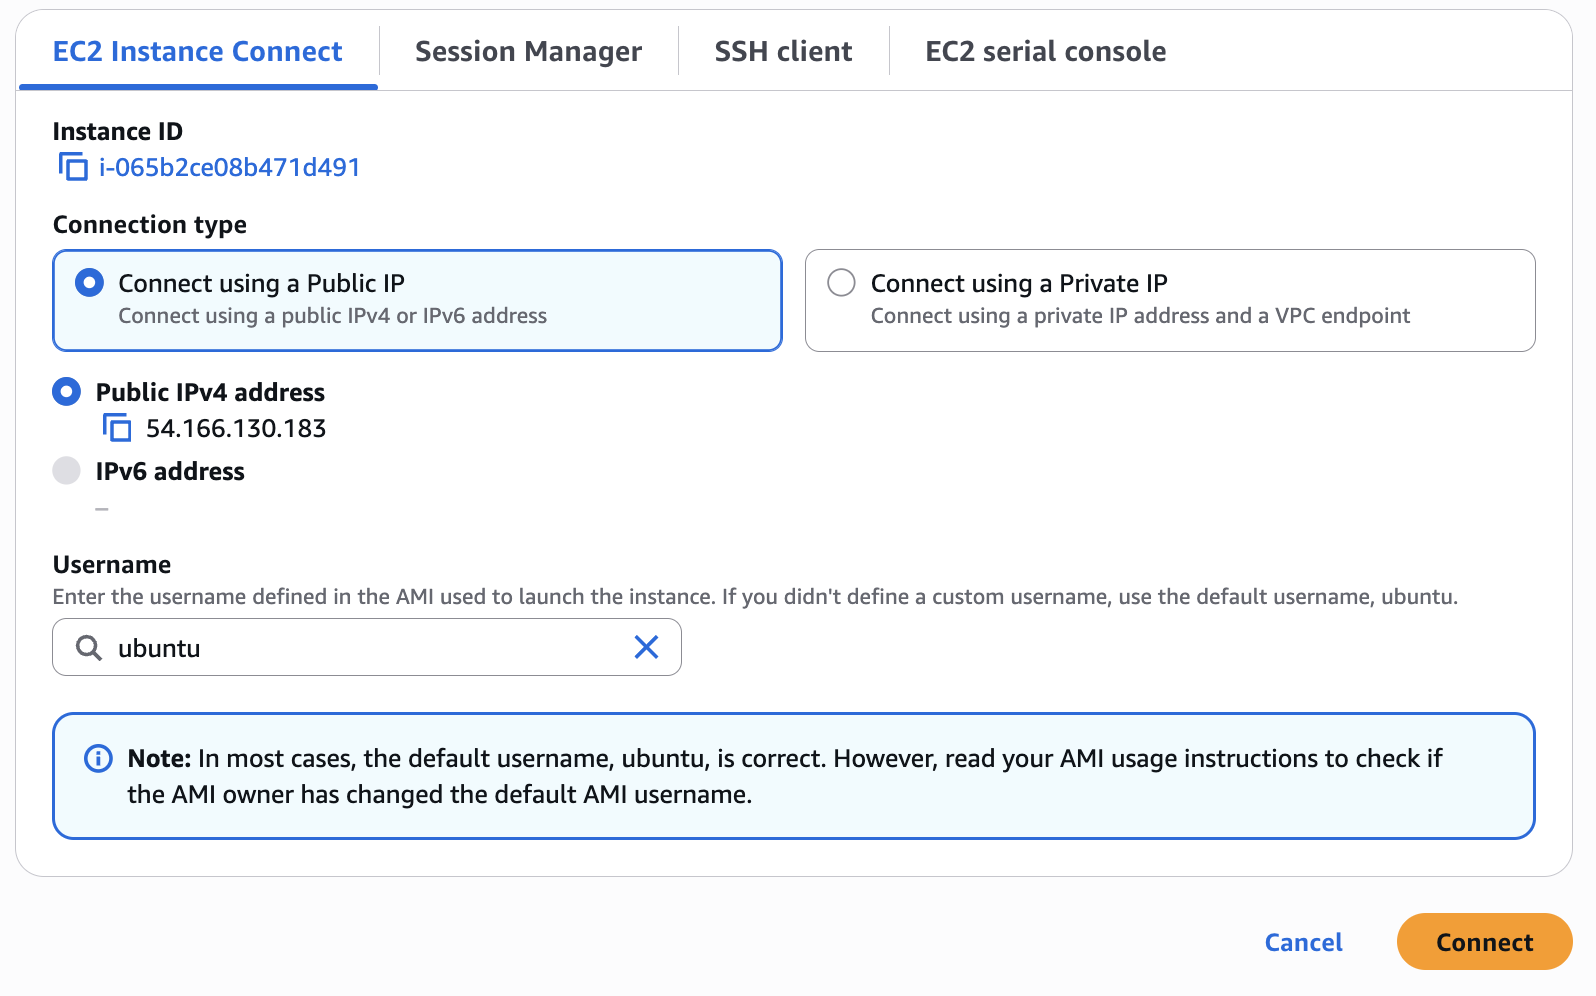 EC2 Instance Connect
Select EC2 Instance Connect and click Connect. This opens a browser-based terminal - no SSH setup required!
Step 14: Install Node.js
You're now connected to your Ubuntu server via the browser terminal.
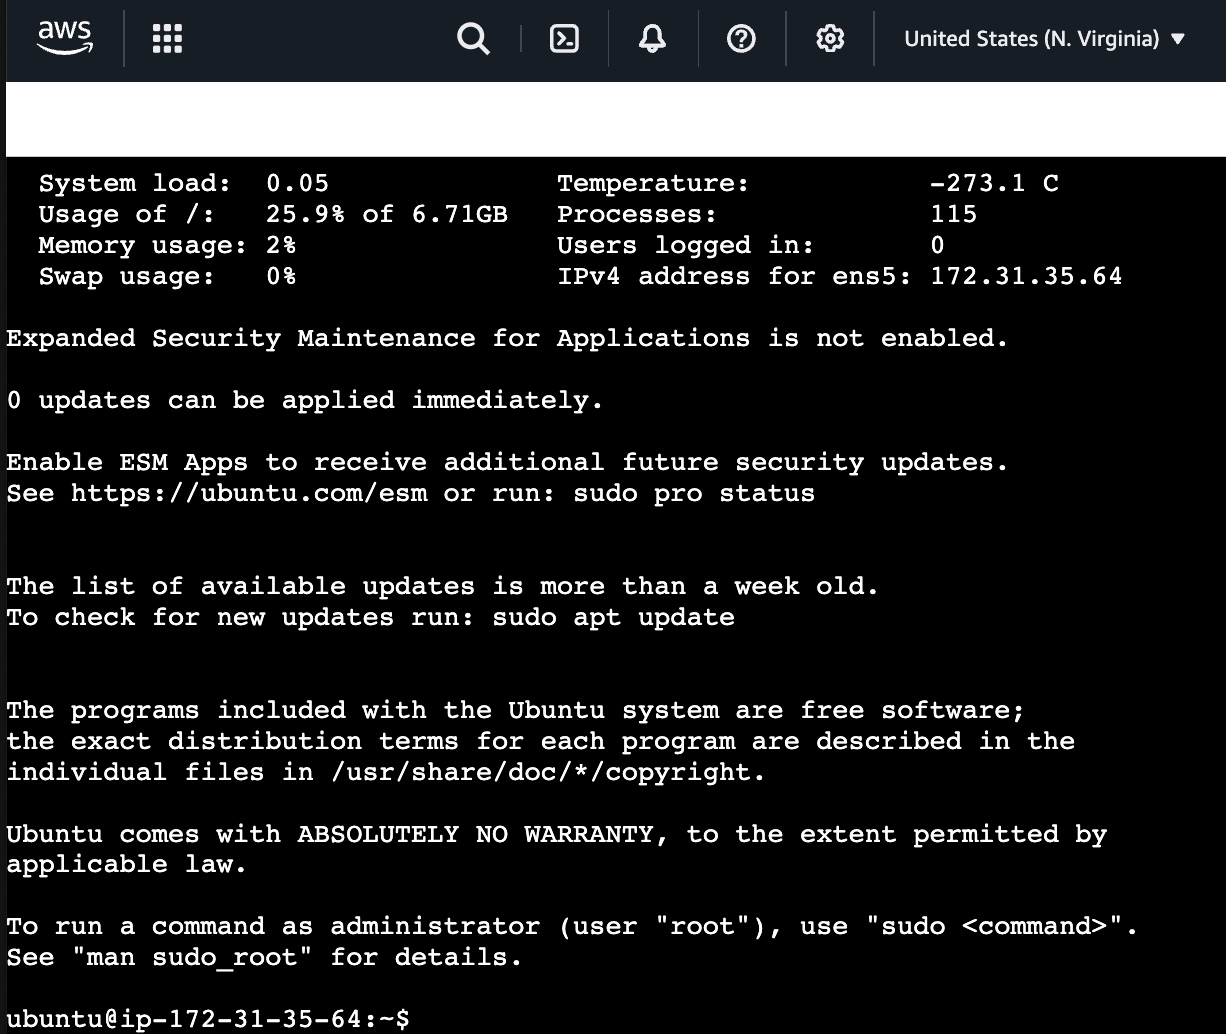 Ubuntu Terminal
First, install Node.js 22.x (required for OpenClaw):
curl -fsSL https://deb.nodesource.com/setup_22.x | sudo -E bash -
sudo apt-get install -y nodejs
Verify the installation:
node --version  # Should show v22.x.x
npm --version   # Should show 10.x.x
Step 15: Install OpenClaw
Install OpenClaw globally via npm:
sudo npm install -g openclaw
Step 16: Run the Setup Wizard
Run the onboarding wizard with the daemon flag to auto-start on boot:
openclaw onboard --install-daemon
Step 17: Accept the Terms
OpenClaw is powerful and has access to your system. Confirm you understand by selecting Yes:
 Risk Confirmation
Step 18: Select Onboarding Mode
When prompted for Onboarding mode, select QuickStart:
 Onboarding Mode
Step 19: Select Anthropic as Provider
Choose Anthropic as your model/auth provider:
 Select Auth Provider
Step 20: Choose Auth Method
Select Anthropic token (paste setup-token) to use your Claude subscription:
 Auth Method
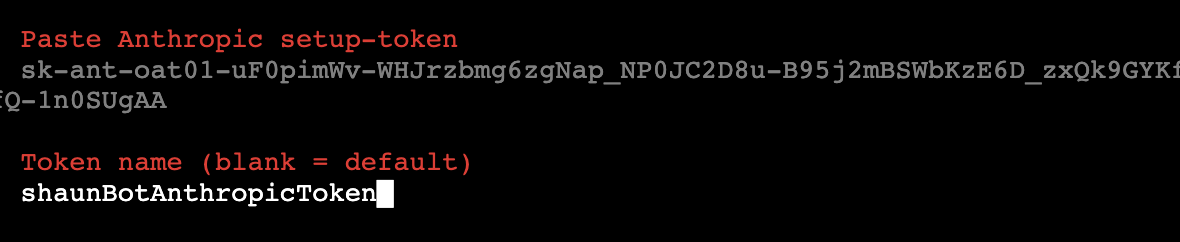
Step 21: Paste Your Setup Token
Get your setup token by running claude setup-token on another machine with Claude CLI, or use an API key. Paste it here:
 Paste Token
⚠️ WARNING: Make sure you paste the ENTIRE token! Copying and pasting from the terminal sometimes cuts off the end. Double-check that your token is complete before pressing Enter.
Give your token a name (or press Enter to use "default"):
 Token Name
Step 22: Select Your Model
Choose your default model. We recommend anthropic/claude-opus-4-5 for the best capabilities:
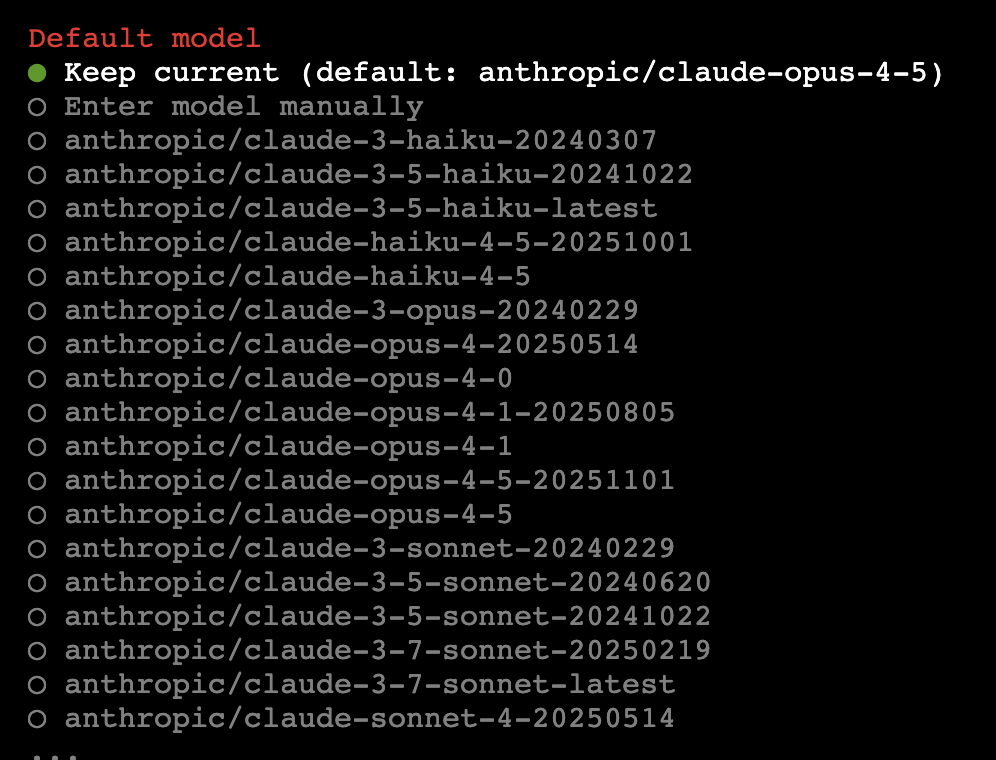 Model List
You can also choose Sonnet for faster responses or Haiku for simple tasks.
Step 23: Configure Telegram
Select Telegram (Bot API) as your chat channel:
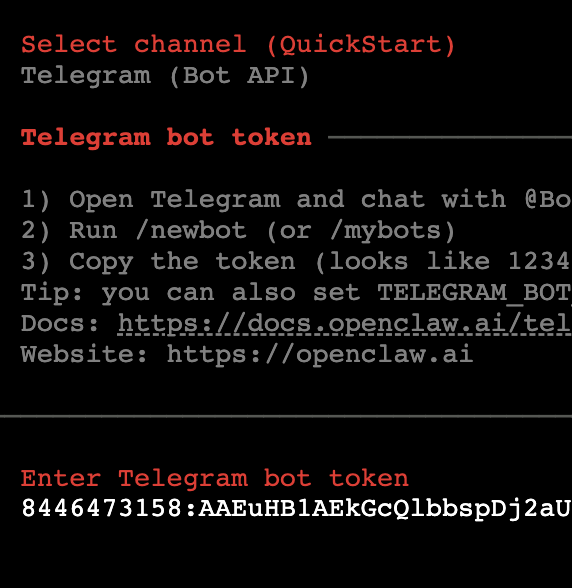 Select Telegram
To get a Telegram bot token:
- Open Telegram and chat with @BotFather
- Send
/newbotand follow the prompts - Copy the token (looks like
1234567890:ABCdefGHIjklMNOpqrsTUVwxyz)
Step 24: Configure Skills (Optional)
OpenClaw will ask if you want to configure skills now. Select No to skip for now (you can always add skills later):
 Skills Configuration
Step 25: Enable Hooks (Optional)
Hooks add extra functionality. Select Skip for now to keep things simple:
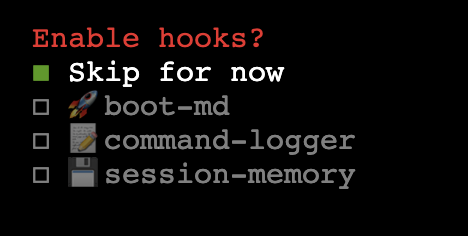 Enable Hooks
Step 26: Shell Completion (Optional)
You can optionally install shell completion for easier CLI usage. Select No to skip:
 Shell Completion
Step 27: Hatch Your Bot!
Finally, choose how to launch your bot. Select Hatch in TUI (recommended) to start chatting immediately:
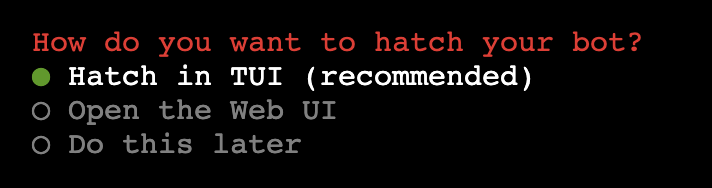 Hatch Bot
This opens the Terminal UI where you can chat with your AI assistant directly.
Step 28: Pair with Telegram
- Open your Telegram bot and send any message
- OpenClaw will reply with a pairing request
- In your terminal, run:
openclaw pairing approve telegram <request-id>
🎉 Done!
Your AI assistant is now live on Telegram. Start chatting!
Cost Summary
Running OpenClaw on a t3.medium spot instance costs approximately:
| Item | Monthly Cost |
|---|---|
| EC2 t3.medium (spot) | ~$9 |
| EBS Storage (20GB) | ~$1.60 |
| Data Transfer | ~$1-2 |
| Total | ~$12/month |
Compare this to managed AI assistant solutions at $100+/month - you're saving 80%!
Next Steps
- Set up spot instance monitoring for termination alerts
- Configure additional models (Haiku for simple tasks)
- Enable web search and browser automation
- Connect Discord, Slack, or WhatsApp
Check the OpenClaw docs for more configuration options.
Questions? Join the OpenClaw Discord community!
More Articles
Building AI Workflows with Tool Chaining in OpenClaw
Master the art of chaining tools and function calls to build powerful multi-step AI automation workflows—from data extraction to content generation and deployment.
Cost Optimization Guide for Self-Hosted AI Assistants: Run Claude on a Budget
Practical strategies to reduce API costs for self-hosted AI assistants—smart model routing, caching, batching, and OpenClaw-specific optimizations to run Claude affordably.
Deploy Your AI Assistant Across Discord, Telegram, and Slack with OpenClaw
Complete guide to deploying a single AI agent across multiple messaging platforms using OpenClaw—handle Discord, Telegram, and Slack from one unified backend.